
Essential Boating Knots: Cleat Hitch, Clove Hitch, Bowline
Learn the boating knots every skipper needs: how to tie a cleat hitch, clove hitch and bowline, plus when to use each one to tie a boat to a dock.
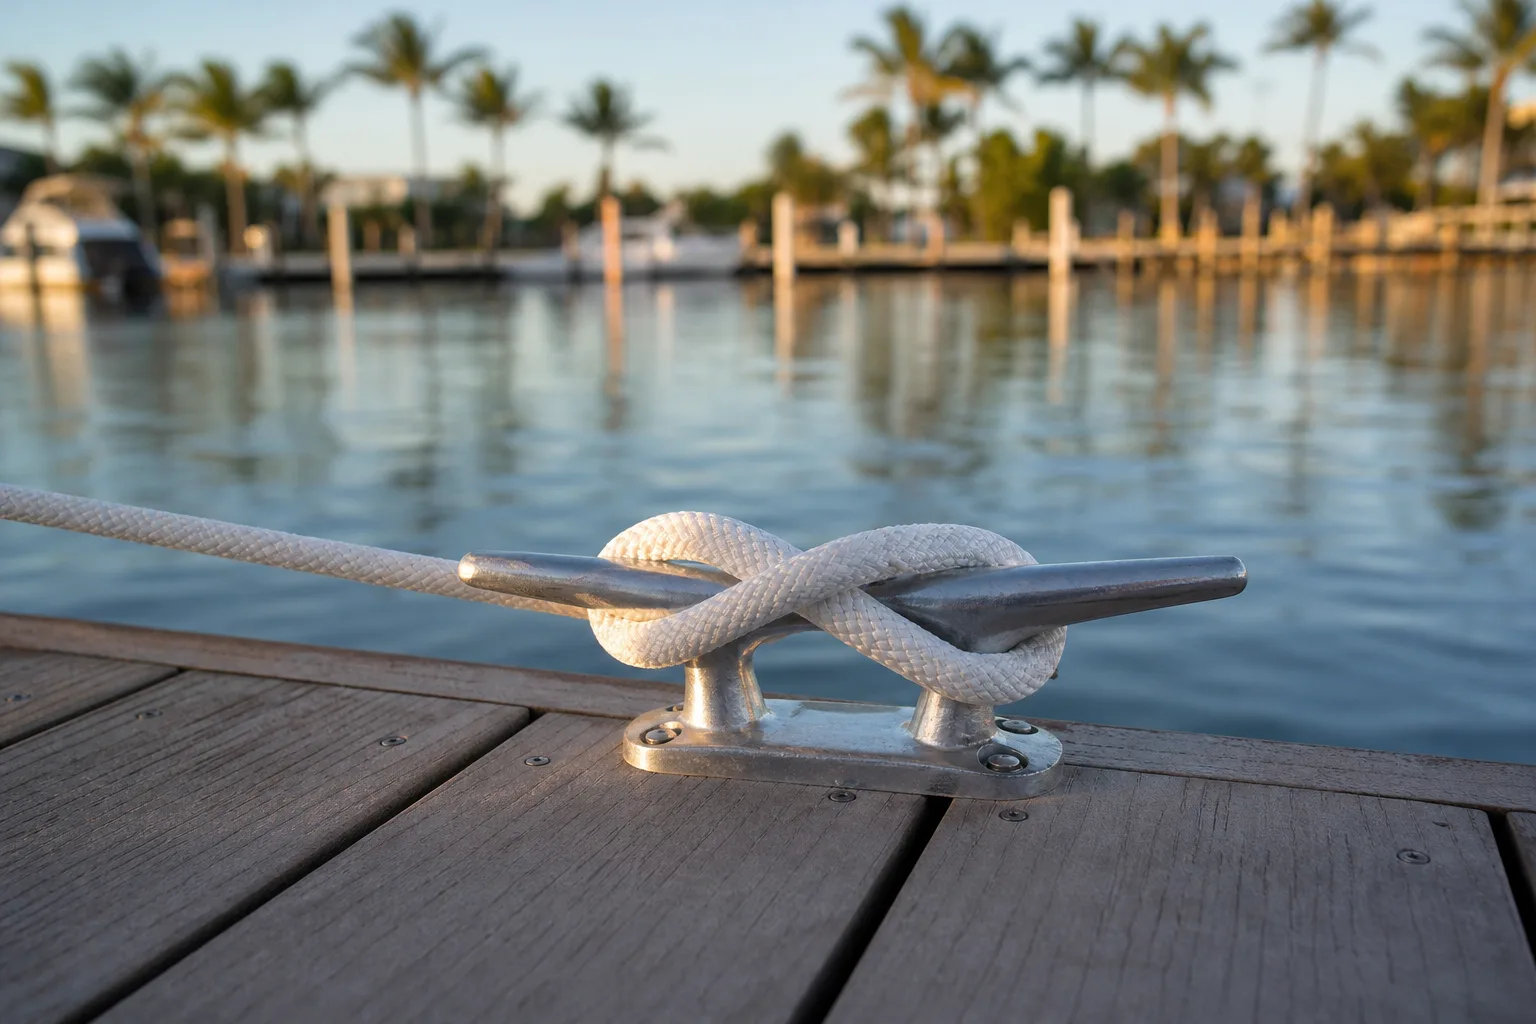
The three boating knots to learn first are the cleat hitch, the clove hitch and the bowline. The cleat hitch ties a line to a cleat, the clove hitch is a quick temporary hitch around a post, and the bowline makes a fixed loop that drops over a piling and still unties easily. Add a round turn and two half hitches for heavy loads and a figure-eight stopper for line ends, and you can tie a boat to a dock in almost any situation.
Which knot for which job
Pick the knot by what you are tying to and how long it has to hold. This table is a quick guide; the steps for each knot follow below.
| Knot | Best for | Watch out for |
|---|---|---|
| Cleat hitch | Securing a dock line to a cleat on the boat or dock | Too many wraps make it hard to release in a hurry |
| Clove hitch | Quick, temporary tie to a post, rail or piling | Can slip if the line goes slack or the post turns |
| Bowline | A fixed loop to drop over a piling or cleat | Not for life-or-death loads |
| Round turn and two half hitches | Tying to a ring, rail or post under steady strain | Takes a few more seconds than a clove hitch |
| Figure-eight stopper | Keeping a line end from running through a block or fairlead | Does not hold a boat by itself |
How to tie a cleat hitch
The cleat hitch is the knot you will tie most often when you tie a boat to a dock. It holds firmly, and you can adjust or cast it off quickly. A cleat has two arms, called horns.
- Take the line once all the way around the base of the cleat, under both horns, so the wrap grips the cleat.
- Bring the line up and across the top of the cleat, over the far horn.
- Pass it under the near horn so it makes a diagonal, then back across the top. You are making a figure eight over the two horns.
- Finish with a locking turn: flip the last crossing so the free end tucks under itself and lies parallel to the line coming off the cleat.
- Give it a firm tug. A good cleat hitch looks neat and symmetrical, and the working line and the tail run in the same direction.
To untie it, push the locking turn back, loosen the crossings and lift the line off. Resist adding extra wraps: they only make the line harder to release when you need it off fast.
How to tie a clove hitch
The clove hitch is easy to tie and easy to adjust, which is why boaters use it for fenders, short stops and quick ties to a post. Its weakness is that it can slip when the load comes and goes, so treat it as a temporary hitch.
- Pass the free end around the post or rail.
- Cross over the standing part, the long side of the line, and take the end around the post a second time.
- Tuck the free end under that last turn, so it sits between the two wraps.
- Pull both ends to snug the hitch against the post.
The clove hitch needs steady pressure to stay put. If the post can rotate, or the line may go slack, back it up with a half hitch around the standing part or use a round turn and two half hitches instead.
How to tie a bowline
A bowline makes a loop that will not slip or tighten under load and that you can still untie after it has been under strain. That is why it works well for dropping a loop over a marina piling: it is easy to cast off even if another boat's line sits on top of yours. It is a good mooring knot, but it is not recommended where a failure would put someone's life at risk.
- Make a small loop in the standing part of the line, leaving enough tail for the loop size you want. This is the "rabbit hole."
- Pass the free end up through the loop, as if the rabbit is coming out of the hole.
- Take it around behind the standing part, the "tree."
- Bring it back down through the loop, the same hole it came out of.
- Hold the standing part and pull the tail to tighten. Check that the tail ends up inside the loop.
Size the loop for the piling before you tighten it. Factory-spliced eyes in dock lines are often too small for large pilings, so a tied bowline gives you more flexibility.
Round turn and two half hitches
When a line has to hold under steady strain, for example to a ring or a rail, this is the dependable choice. The full turn takes the load off the knot, and the half hitches lock it.
- Pass the line around the post or ring twice, a "round turn." The extra turn spreads the strain and lets you hold the load with one hand.
- Take the free end around the standing part and through the loop to make a half hitch. Pull it snug.
- Make a second half hitch in the same direction, a little further along the standing part.
- Pull the standing part to tighten the whole knot.
Figure-eight stopper
A figure-eight is a stopper at the end of a line. It keeps a line from slipping through a block, a fairlead or a hole, and it stays easy to untie after loading.
- Make a loop with the free end.
- Cross the end over the standing part and wrap it behind.
- Bring the end through the loop from the front.
- Pull on the end and on the standing part to snug the knot.
It is also the base of other knots, but on its own it is a stopper, not a way to hold a boat.
Tying a boat to a dock
When you tie a boat to a dock, you usually need more than one line. Bow, stern and spring lines work together: the bow and stern lines stop the boat from moving away from the dock, and the spring lines limit forward and backward movement. Cleat each line on the dock side with a cleat hitch, or put a bowline on a piling and run the other end to a cleat on the boat. Keep lines short enough to stop the boat from banging against the dock but long enough to allow for movement.
Add fenders between the hull and the dock at the widest part of the boat. Tie them with a clove hitch backed up by a half hitch, or fasten them to a rail where they can be adjusted for height. For more on the hardware on your boat, see our guide to the parts of a boat.
Docking lines and tide range
In tidal water, the dock and the boat do not rise and fall together if the dock is fixed. On a floating dock they move together, but a fixed dock or piling stays put as the water changes. A line that was snug at low tide can hang the boat at high tide or leave it dangling at low tide.
- Check the tide for your marina before you leave the boat. Marinalo publishes tide times for places along the coast, including Florida.
- Use longer lines on a fixed dock so the boat can rise and fall with the water. Cleat them so the length can be adjusted without untying the knot.
- Remember that the tidal range varies through the month. Spring tides give a bigger range than neap tides, and king tides can push water higher than usual.
- Look at your lines again after a big change in the water level, and after strong wind or current.
To understand why the range changes, see how the moon affects tides. For the language of tides at the dock, read our guide to ebb, flood and slack tide.
Practice and care for your lines
- Practice each knot on a stationary cleat or post at home until you can tie it without looking.
- Learn to tie the cleat hitch and the bowline with one hand, because you may be holding the boat with the other.
- Inspect dock lines for chafe, sun damage and stiffness, and replace worn lines.
- Use chafe guards where a line passes through a fairlead or rubs on a rail.
- Do not rely on a knot to hold a heavy load without checking it. Any knot depends on the line, the condition of the rope and the way it is tied.
FAQ
What is the best knot to tie a boat to a dock?
The cleat hitch is the standard way to tie a dock line to a cleat. For a piling with no cleat, a bowline loop over the piling is a common choice.
Is a clove hitch secure enough for mooring?
Only for short, temporary ties. A clove hitch can slip if the line goes slack or the post rotates, so back it up with a half hitch or use a round turn and two half hitches for longer stays.
Why is the bowline so popular?
It makes a fixed loop that does not slip, and it is easy to untie even after it has carried a heavy load.
How many wraps should a cleat hitch have?
One full turn around the base, a figure eight over the horns and a locking turn. More wraps do not add strength and make the line harder to release.
What knot stops a line from running through a block?
A figure-eight stopper tied in the end of the line.
Do I need to adjust dock lines when the tide changes?
If your dock is fixed and the water moves a lot, yes. Leave enough slack for the rise and fall, and check the lines again after big changes in the water level.